Between birthdays, wedding showers, graduations, and more, it feels like there’s always a celebration to bake for! Learn how to frost a cake the Makerz Bakerz way, which is easy AND fun, with these super sweet frosting hacks.

Super Simple Stripes, Spirals, & Swirls
If you want to know how to frost a cake for beginners, then look no further. These patterns are quick ‘n’ simple to make, but will impress your guests. No piping bag needed! For all techniques, you’ll want to start by making sure you have about a ½-inch thick layer of frosting on top of your cake.
For Stripes:
Use the back of a spoon and move back and forth across the cake, applying light pressure to make indentations in the frosting. Be careful to not get too close to the edge, pushing the frosting over the edges of the cake!
For Spirals:
Using the back of a spoon, start in the center and move the spoon in one long, concentric circle, applying light pressure to make indentations. As you get close to the edge of the cake, gently begin to lift the spoon so that when you reach the edge, the spoon has completely been released.
For Swirls:
Using the back of a spoon (a soup spoon works best!), make random swoops into the frosting in different directions by applying light pressure.
Give one of these techniques a shot with this totally epic Galaxy Cake. Kids and adults will love the creativity and fun-to-look-at nature of this unique treat.
Pro Cake Frosting Tip: Try using Duncan Hines® Whipped Vanilla Frosting or Duncan Hines Whipped Chocolate Frosting for super easy spreading.
Cupcake Flower Power
Fancy up your cupcakes with stunning flower designs for Easter celebrations, summer birthday parties, and so much more with this dazzling technique. Explore the cake frosting tips and steps below to create flower-covered cupcakes that will look like they came straight from the bakery.
Pro Cake Frosting Tip: Put piping bag in a cup and fold sides over for easier frosting-filling.
- Place half a container of Duncan Hines Whipped Fluffy White Frosting in a small bowl. Add food coloring of your choosing and stir.
- Fill piping bag or resealable freezer bag with colored frosting, squeeze the frosting to one corner of the bag, and push out any excess air before sealing the top of the bag.
- Cut a ¼-inch slit along the seam in the corner of the frosting bag.
- Hold the bag with the slit vertical to the cupcake and, using a squeeze-and-release motion, pipe petals along the outside edge of the cupcake. It’s OK if the frosting hangs over the edge!
- Pipe another ring of petals toward the middle of the cupcake, leaving the very center of the cupcake open.
Pro Cake Frosting Tip: Use sprinkles, berries, or small candy pieces to create the pistil in the center of the cupcake.
No-Fuss Cupcake Swirlz
Get that fresh-from-the-fancy-bakery appeal with this swirly technique. Make your fave cupcake recipe, like these vibrant Rainbow Cupcakes and summery Lemonade Cupcakes, then try out “the swirl.” Simply use the steps below and start frosting like a pro.
- Fill piping bag or resealable freezer bag with the Duncan Hines frosting of your choice, squeeze the frosting to one corner of the bag, and push out any excess air before sealing the top of the bag.
- Cut off the corner of the bag with the frosting so you have an opening that is about ½-inch wide.
- Hold the bag about ½ inch above the cupcakes so that the frosting is not squashed as it comes out; start at the edge of the cupcake and pipe a swirl, releasing when you reach the center.
Pro Cake Frosting Tip: Have fun with frosting flavors! Try Duncan Hines Creamy Lemon Supreme Frosting or Duncan Hines Creamy Strawberries ’n Cream, or try making your own unique flavor.

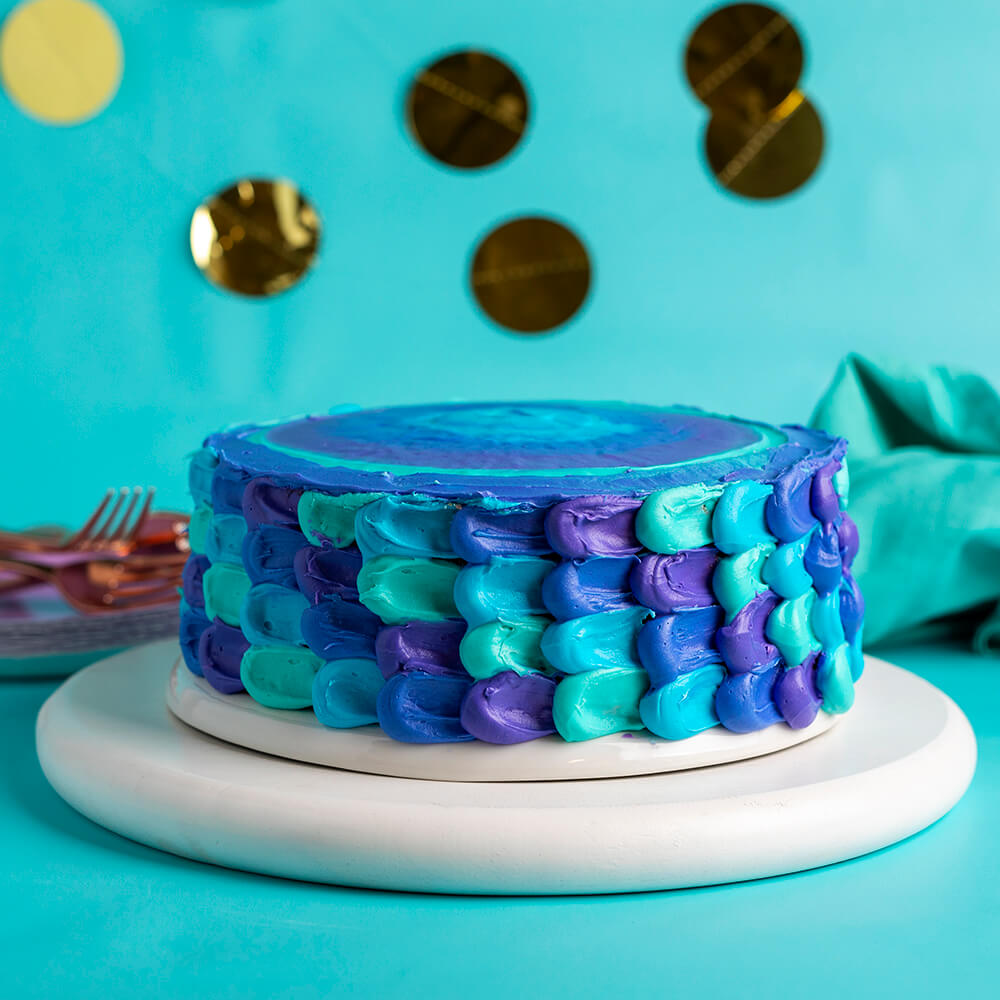
Easy Peasy Petal Cake
Dress up all your favorites by adding easy-peasy petals to Duncan Hines Joyfetti Cake, Duncan Hines Devil’s Food Cake Mix, and so many more! This technique looks complicated, but with these cake frosting tips, you’ll be showcasing your petal prowess in no time. Follow the steps below and get frostin’.
Pro Cake Frosting Tip: Never frost a warm cake. Always make sure cakes and cupcakes are completely cooled to avoid frosting melting off.
- Scoop equal amounts of frosting into 4 small bowls. Dye each bowl the color of your choice. Try purple, violet, aqua, and blue for a mermaid theme, or pretty pastels for a spring-themed dessert. Have fun with it!
- Put each frosting color into a piping bag or resealable freezer bag. Cut off a small corner, about ½-inch opening, from each bag.
- Place one cooled cake layer on a serving plate. Using roughly an equal amount of each color, squeeze frosting onto top of first layer; you just need an 1/8-inch-thick layer. Use a spatula to blend the colors and fill in the gaps. You won’t see this until you cut into the cake, so get creative with it! Place second layer of cake on top of frosting layer.
- Now, here comes the fun part. Using the color pattern of your choice, pipe 4 dots down the side of the cake layers. Each dot should be about an inch in diameter. Use a spoon to swipe through each dot to make a petal shape. Be sure to use a different spoon for each color dot. Repeat until the whole cake is covered. Use remaining frosting to frost the top of the cake, and use a spatula to gently smooth it out and blend the colors.
See? Learning how to frost a cake like a pro isn’t so hard! Visit the Easy Peasy Petal Cake page for the full recipe.
Now you’re ready to create eye-catching cakes and cupcakes without having to pay that big bakery price tag. Use these frosting hacks as a guide and get creative!
Check out Makerz Bakerz for fun baking content that will have you making über fabulous and extraordinarily delicious baked goods in no time!